< Back to Manage your groups and students
How to create closed groups
Closed groups allow you to track students' work, as they must have their own account on the platform. When students access their account, they can see pending tasks, as well as the results of previously completed tasks. To do this, they will need to log in or create an account.
If you do not want students to track their tasks or create an account, you can instead use open groups.
To create a closed group, go to the My groups section in the sidebar and select the Create new group option. Input a name to identify it and select the Closed group option.

Once the group has been created, you must add students to this group so they can receive the tasks assigned to them. Once all the students have been added to the group, you have the option to lock the group, preventing more students from joining by using the code.
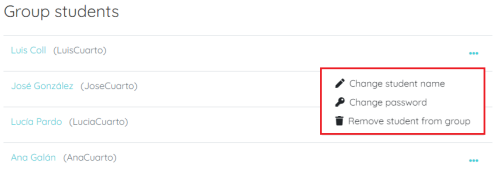
As students join the group, you will be able to see their names and manage their data on this page. As a teachers, you will be able to change the student's name and password, as well as remove them from the group.
In the Assigned tasks section you can find all worksheets assigned to the group. The tasks are assigned in the same way as with the open groups, but in this case you will not need to share the link with your students. In addition, you can easily see if your students have completed them, making it easier to follow up on tasks. For example, in the image you can see how one of the four students in the group have already handed in one of the tasks.

Finally, in the Statistics section you have access to the average grade of the group, of every student and each worksheet, as well as a list of the students' submissions, which you can export to Excel. Some of the options in the Statistics section are only available for premium accounts.
